Given the success of the four grow-beds we made earlier in the summer, we have decided that all new planting will be in grow-beds, unless it is winter-time and we have enough water, obviously. However, this rather begs the question as to what form the grow-beds should take – the first ones were made with “cheap” plastic and a few bits of wood, and a hell of a lot of digging.
So, as we took the opportunity to buy more poly-tunnel poles to make a new greenhouse when we ordered the pig-pen steel, we need to think what style of grow-bed we want in our new 15 metre poly-tunnel. Having learned that 2 metre wide grow-beds are too wide, we think making grow-beds out of ferrocement, based on a plywood sheet base (just to help form the base) would be a good size – 2.5 x 1.25 metres. That would give us just over 3 square metres of grow bed. The only down-side is that we will need 18 of the things, just for the new greenhouse.
So, having never made anything like this before, we bought ourselves some chicken wire and made a start:
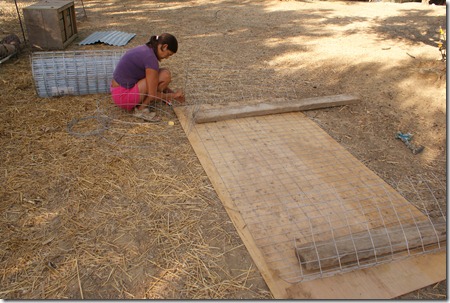
First off, laying out the wire frame. We used some thin reinforcing wire, over which we will lay the chicken-wire:
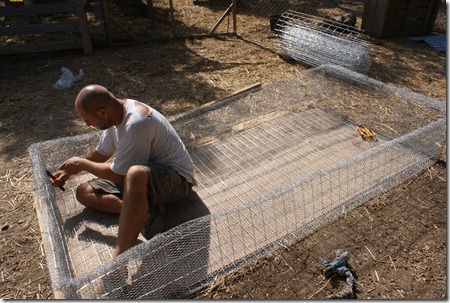
The frame complete, ready for chicken-wire. Very confident at this point, as it took hardly any time, and seems to be perfectly sized. We have worked out that we should have enough wire to make 6 grow-beds, at a cost of about 80 euros for the wire, so not hugely expensive per grow-bed.
We had hoped that tying all the corners together would strengthen and tighten up the sides, but it is looking a bit floppy at this point, especially along the long sides. Still, it’s getting that organic, flowing look that ferrocement people seem to enthuse about….
So, it took two of us about 4 hours to get to to the point where we are ready for the cement – slap that on tomorrow, and all finished. Two days per bed – can’t be bad.
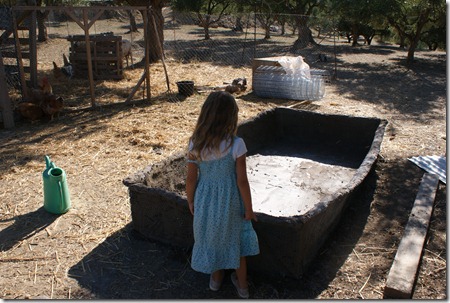
Next day – cement. No photos of the process, because we were covered in cement and therefore not really keen to get the camera out, but the “finished” article is here:
We seem to have made a boat! A fairly grumpy morning’s work, as things did not go well. Firstly, we didn’t wire the two layers of chicken-wire together, so when the cement went on, the two layers moved apart, and so our lovely thin ferrocement walls got thicker and thicker. We had to stop cementing to spend forever putting more fiddly bits of wire in to pull it together.
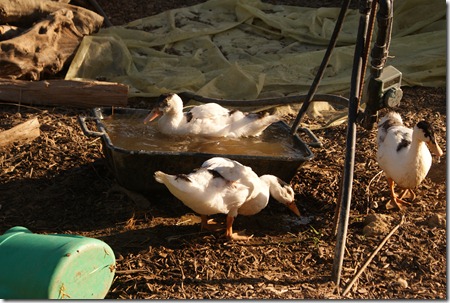
Also, there is no way that a single application is going to be enough. There are holes and gaps and quite a lot of wire showing through, so a second coat will be required. Mixing the cement is tricky, as it is either too wet or too dry, but only rarely just right. It also used a lot more cement that we anticipated – this thing took an entire bag of cement, assuming sand and cement weight the same (which I don’t think they do), we have a 200kg duck-pond, in completely the wrong place. Here is the current duck-pond:
So, in conclusion, we have learned quite a bit. We had no idea before we started just how much materials would be needed. Total cost for a 2.5×1.2m grow-bed, is somewhere around 30 euros, and that doesn’t include thicker steel to keep the sides from bowing out as they are cemented.If we only wanted one or two, that’s fine, but we need 18 of these grow-beds just for the greenhouse, plus another load around the house. At about 10 euros per metre, there are certainly cheaper options available, which we shall be using from now on. Just making a pored cement structure would be a similar price, but much, much quicker and easier. Plastic sheets in a trench will definitely be the best option for the greenhouse – a 15mx8m sheet is 80 euros, which will do 4 grow-beds; the price per metre is going to be 1.33 euros, or just about a tenth of the cost of a ferrocement bed. However, ferrocement is for ever, but we can replace the plastic every 5 years for the next 50 years before we start to lose money. I think I know which way we will be going ![]()


